The pond pump is a key component of a pond as it keeps the pond water in continuous circulation.
Without it, the fish will not be able to thrive and the water will stagnate causing algae to grow and you may have no fish left.
In this article, we will show how easy it is to install a pond pump.
Table of Contents
Determine the Depth of Your Pond And Type of Flow You Want
The depth of your pond has a huge impact how how how you will need to set up your pump.
The deeper the body of water, the more powerful the pump will need to be as it needs to move a greater volume of water.
If your pond is deeper than 2 feet, consider installing a submersible pump over an above-ground model.
Pumps with an adjustable flow are better for ponds that have uneven terrain features or if you want it to run only part-time during certain times of the year.
The degree of water circulation you want depends on how much light and oxygen the fish need. Some species prefer calm water without a lot of turbulence, while others thrive in a moving current of water.
If you have an underwater filter, you can run your pump at half power as it will provide more than enough circulation for the pond to function properly.
Select the Right Size Pump
Depending on the volume of your pond and the type of flow you will need in it, the size of the pump you need will vary.
To make sure that it is a powerful enough pump, look how many gallons per hour (GPH) are needed to move the type of rigging you have.
For example, if you plan on installing an above-ground pond pump in a 500-gallon pond exclusively for your fish then use a minimum of 1000 GPH pump. If it is an under-sink model or submerged in another body of water you can use any model as long as its flow rate can handle at least the amount of movement needed by your fish and plants.
If your pond has several different features such as plants, logs, and other obstacles that require more depth then purchase a submersible model rated for deeper depths than required.
You can find the most suitable pump for your pond from our guide on the best pond pumps.
Locate the Right Place to Install The Pump
The pump needs to be located either directly inside the body of water if it is a submersible model. Never place it on land as this will cause it to burn out.
If you are using an above-ground model and have enough room in your yard, consider installing a pond howitzer between two trees that take up little space.
However, most models require a concrete base with at least 3 inches of concrete around where it sits so its weight does not damage soil over time or cause sinking into soft terrain.
Also, make sure the pump is out of sight and away from splash zones as this will cause it to rust quickly.
Try to keep the pump close to the pond. This will save piping and excavation cost and reduce head loss due to friction of water. If its distance is too far then the flow will be extremely low compared to the actual capacity of the pump.
Mark The Location of Piping
After you have fixed the location of the pump it’s time to mark the locations for the piping.
The length of piping work should be as short as possible. Shorter piping reduces friction loss and piping cost.
Although you can keep the piping exposed on the ground it is best to bury it as much as possible in a trench filled up with gravel, stones, or soil.
If you want to keep the piping above ground, then try to run it behind other objects like trees, garden beds, etc. to hide it as much as possible.
If you want to run the piping below ground, you may encounter obstacles such as tree branches or rocks that may need to be removed. Make sure there are no power lines close by and check for gas piping and sewer lines in your location before proceeding with the installation.
The pipe material you need depends on the installation type. If it is above ground then the piping should withstand the weathering effect of sunlight and impact from hard objects. Bellow ground pipe should be strong enough to take the load of upper soil and withstand the corrosive effect of soil.
Install The Piping
For below ground installation, excavate a trench in the area you have marked. Make sure the base of the trench is leveed or slightly inclined towards the outlet.
While digging the trench, make sure you don’t damage other objects that are also running below ground in that area.
Use good quality flexible coupling to ensure the piping can move during a ground disturbance by an earthquake. Flexibility will also save the pipe from expansion and contraction force due to temperature change.
As it is below ground installation, double-check the joints to ensure they are water-tight to prevent water loss. It will be hard to find and fix afterward. Use food thread sealant in the joints.
For above-ground installation, make sure the piping doesn’t cause any obstacle for other objects like a sprinkler system, spa pool, and automatic lawn irrigation system.
Install The Pump Following The Manufacturer Instruction
If you are installing an above-ground pump, then you should build a base for the pump first. Water pumps vibrate and that vibration would cause impact and pressure on the installation site. The normal base will not withstand the stress exerted by the pump. Install the pump on a concrete base that is at least 3 inches thick and well-reinforced. Bolts should be attached to the concrete base to hold the pump in place. You can also add vibration absorbers if you want to minimize the noise.
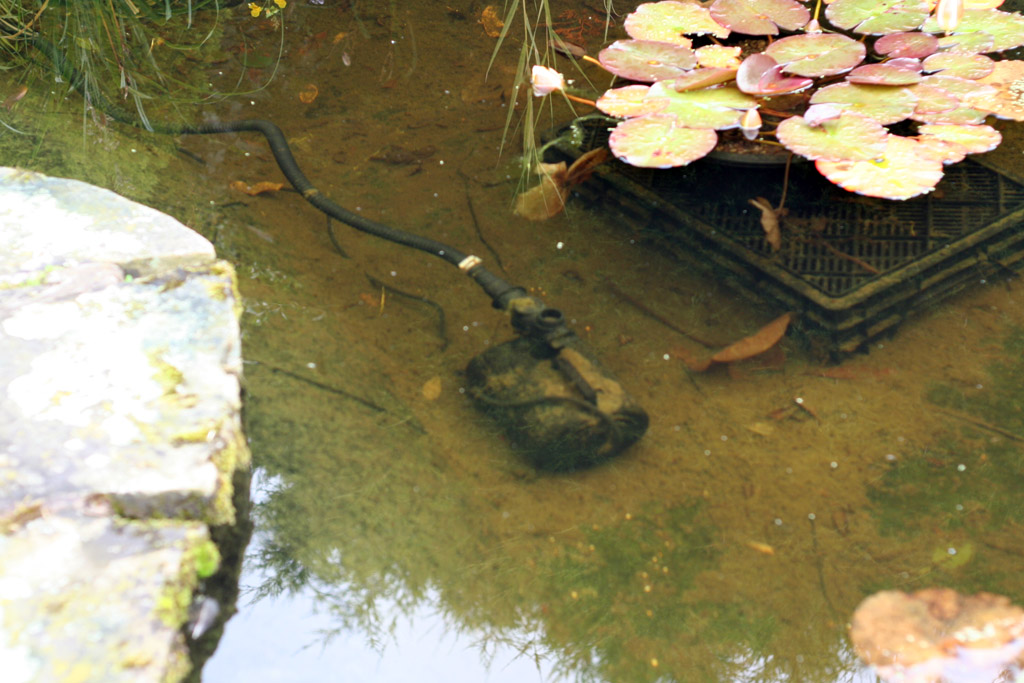
If you are installing a submersible pond pump make sure you install it in a place that is deep enough. The water level should never be below the position of the pump in a season or circumstances. You can also install a water level sensor to keep it in check.
Again, a submersible pump should not the directions on the base. You should keep it at least 6 inches above the base of your pond to prevent clogging of the filter screen by debris. You can use bricks or concrete blocks to raise the base level at the installation point.
Connect the Hose or Piping with Pump
For an above-ground pump, you have to attach both the inlet and outlet hose or piping with your pump. You can use coupling or clamp for the connection but the coupling is recommended for the ease of the work and easy maintenance.
For a submersible pump, you will only have to connect the outlet with the pump.
Connect the Power Cord
The next step is to connect the power cord to the pump. Always follow the manufacturer’s wiring instructions that come with the pump’s instruction manual.
Make sure you connect it to a GFCI outlet to prevent electric shock accidents.
Test It Before You Cover It Up
After the installation of your pond, run water from your hose into the pond and allow it to fill. Turn on the pump and make sure there is enough flow coming out of the other end. If not, check both the inlet and outlet for any leak. You should also check the wiring to ensure it is getting enough electric power.


